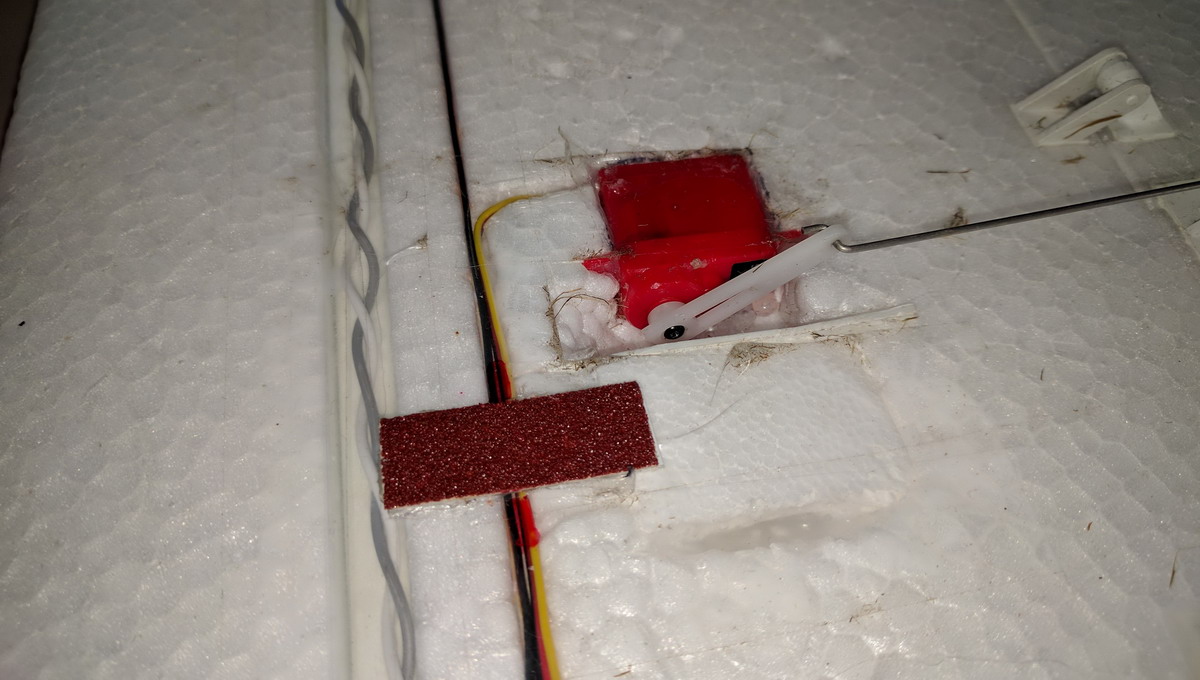
Standard the flap servos are mounted identically at the left and right-wing. If you would like to use one flap channel and a split cable you can replace the servo with a reverse servo or and an electronic reverser in the cable, but there is a simpler solution. You can mechanically change the location of the servo, making room by cutting away some foam. The old location you can be filled with some Elapor spare foam.
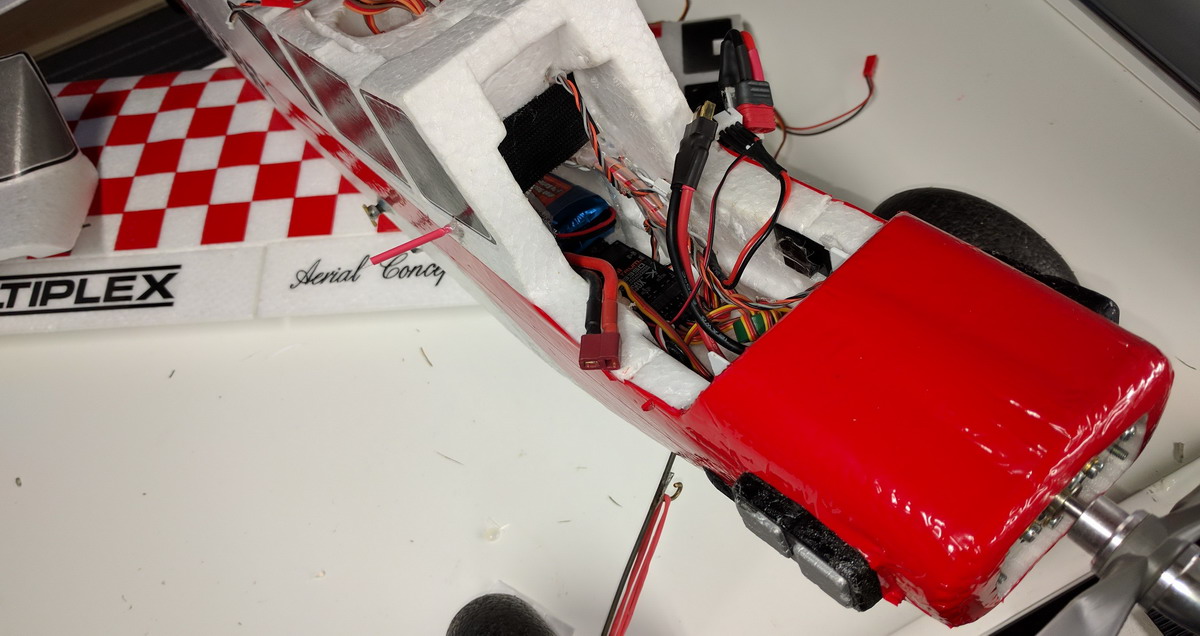
Like any other aircraft, the FunCub must be balanced at a particular point in order to achieve stable flying characteristics. The Centre of Gravity (CG) should be at the position 80 mm aft of the root leading edge, i.e. at the fuselage sides. This is correct, but in fig 30 in the manual, the order of the electronic components is not optimal to achieve this CG.
A better order of the electronic is as follows: From propeller/motor; first the ESC motor controller, than the receiver (RX), and most to the back the battery (3S 2200 mAh). With my battery and this plane, the battery had to be put completely to the back above the air ventilation opening on the bottom of the plane. I have put two horizontal carbon rods so the battery can not move vertically. A piece of Velcro keeps the battery horizontally fixed during flight.
I have glued two small pieces of sanding paper (20mm x 10mm) at the bottom of the plane at centers of gravity about 30cm apart. This makes it easy to put your finger at the Centre of Gravity with sufficient grip to balance the ready to fly this airplane (battery mounted)..
Changed the look of this plane with Oracover ironing film on top of the foam. Cut more than a hundred separate squares 30×30 mm of Oracover film. This film gets sticky without shrinking at a temperature of 70-100 °C. Do not overdo it because the foam can expand a little under the film if you heat too long.
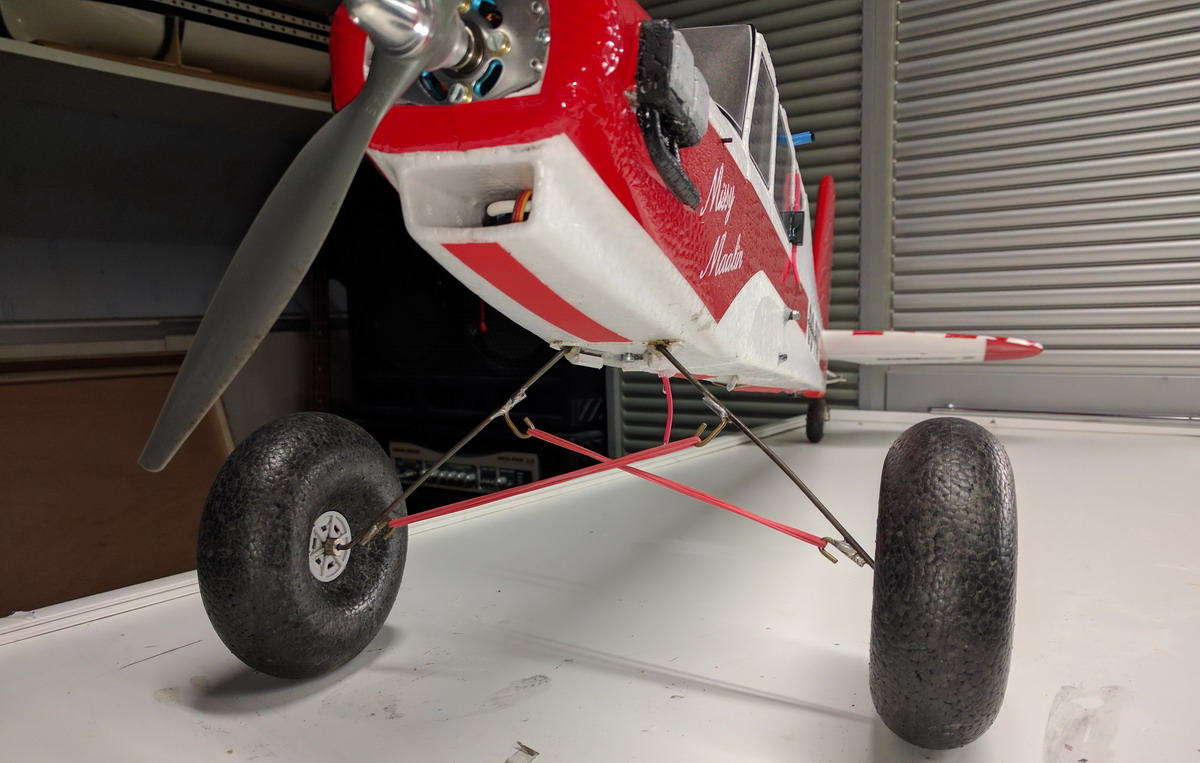
Bent two same hooks in 2 mm copper wire for the wheel-side and two other hooks in 2 mm copper wire for the fuselage-side. Grind (with Dremel or sandpaper) the locations where the hooks should be connected to the 3mm tempered landing gear rod intensively. This is important to make good soldering between hook and landing-gear. If you like you can strengthen the connection by winding some thin copper wiring before soldering.
Use 2×2 elastic bands the reinforce the landing gear. Remove the bands if you are nog using the airplane, so the elastic bands last longer.
After three flying seasons, this plane was taken out of service. Due to the limited power of the two EDFs, the length of the longest runway of our field was sometimes not sufficient.
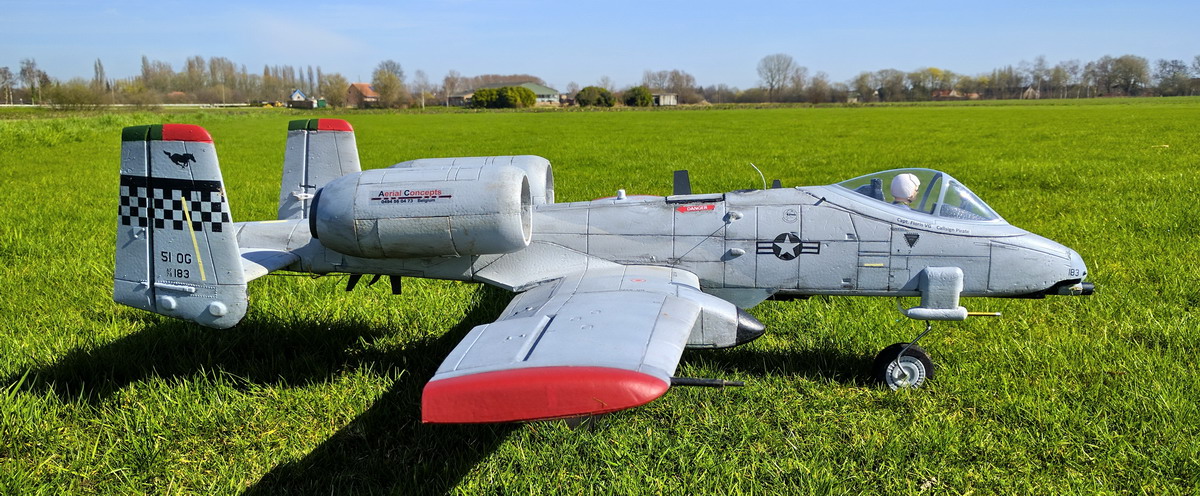
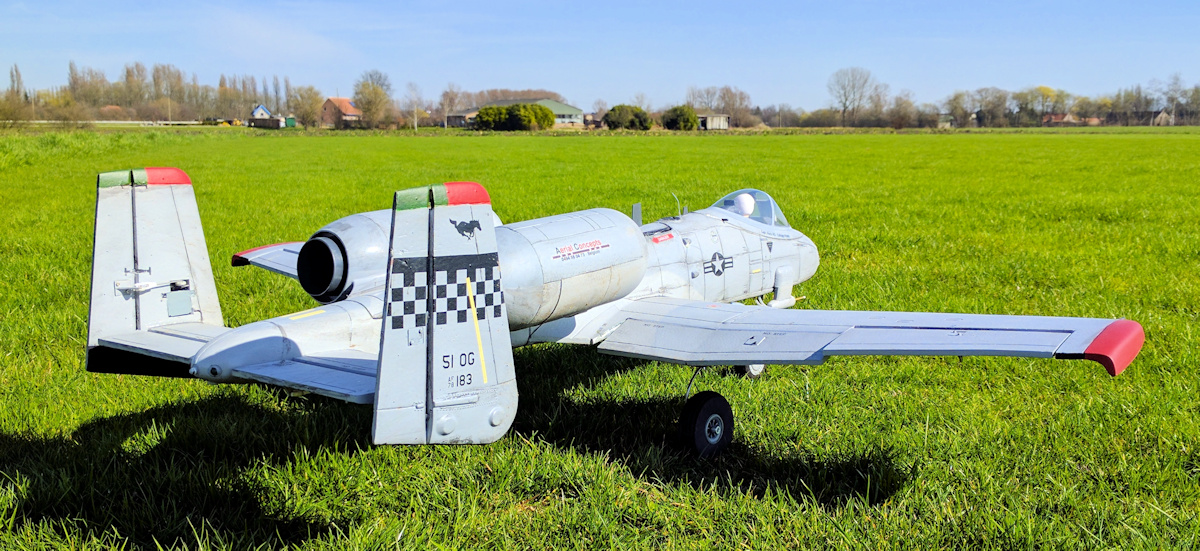
Warbird (Irak and Afghanistan) jet A-10 Warthog Thunderbird II from Freewing with 2×12 blades 64 mm EDF. This is a single-seat, twin turbofan engine, straight wing jet aircraft developed by Fairchild-Republic for the United States Air Force (USAF). Commonly referred to by its nicknames Warthog or Hog.
Modifications
Made a separate central compartment with an access opening for the RX. Applied weathering and improved visibility with red and black wingtips. Put on a bigger landing gear to make this plane suitable for grass fields. Added Spektrum airspeed, temperature ESCs, flight voltage and power telemetry. Installed Spektrum 9 Ch with AS3X gyro technology RX. Modified the ESC bay for better cooling and installed a temperature sensor. Upgraded the 5 blades Freewing EDF units to 64mm 12 blades with outrunner 3300KV motors. Changed all connection screws with bolt and nut connections to easy and reliable dismount and mounting of the wings and the EDF turbines for easy maintenance and transport. Improved the fixation of the elevator pushrod tubes for accuracy and safety.
Aircraft Characteristics after Modification
This Aircraft is put out of service after many flying hours. It made room for the P-38 Lightning “Betty Boop” a two-engine plane also on this Website. The plane was a bit underpowered (only 2x EDF 64mm 12 blades KV3300) and could only take off on our 60m grass runway in ideal circumstances. After recuperation of spare parts, this plane was shredded.
After two flying seasons with a lot of flying hours, this plane was taken out of service to make room for the bigger 1500 mm Thunderbolt Razorback.
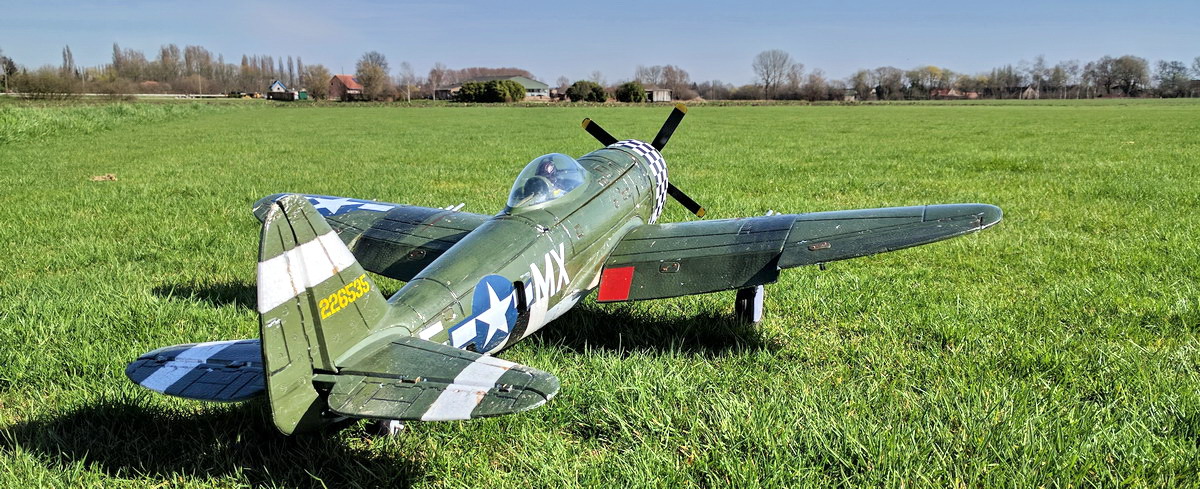
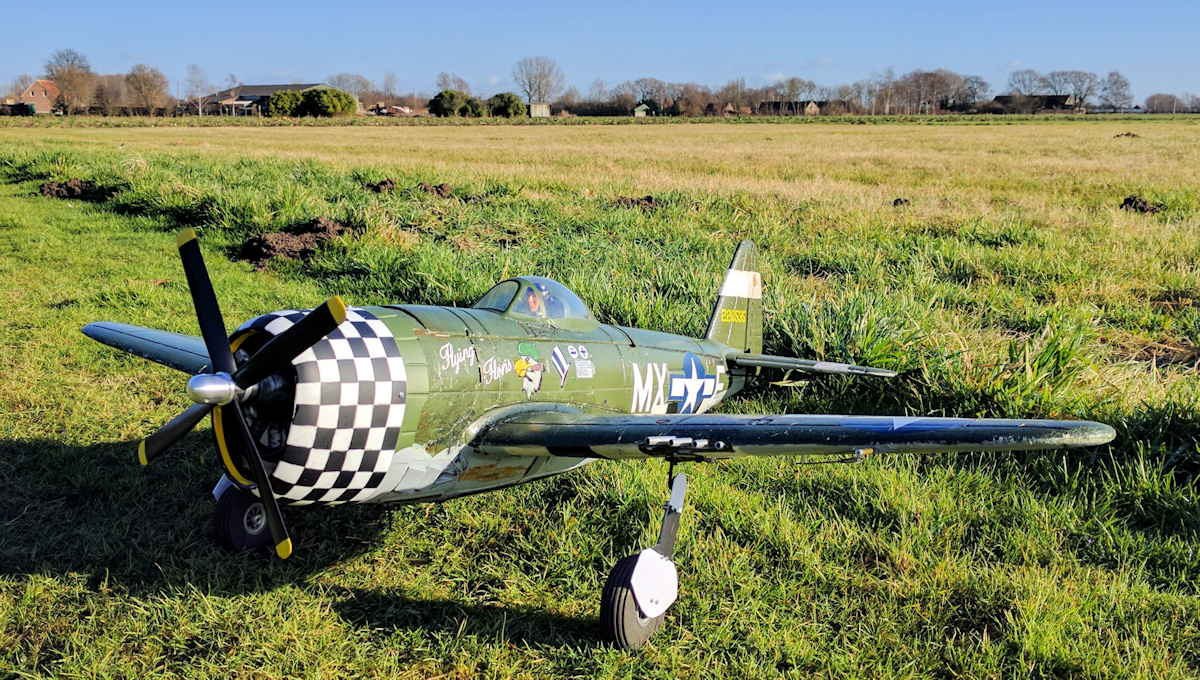
WW II Warbird Thunderbolt P-47D from Eflite with a bubble canopy, olive green with D-day stripes on the bottom. A fighter aircraft produced by the United States between 1941–1945. Its primary armament was eight .50-caliber machine guns and in the fighter-bomber ground-attack role, it could carry five-inch rockets or a bomb load of 2,500 pounds.
Modifications
Bigger wheels and modify landing gear inclination to make it plane suitable for grass fields. Added Spektrum Airspeed, voltage, and Flight power telemetry. Put in Spektrum with AS3X technology 9 channel RX. Added some extra carbon rods in the fuselage and wings after a small crash (wingtip stall). Used different types of weathering techniques to improve the look of this model.
Aircraft Characteristics after Modification
This Aircraft made room for the bigger P-47D Razorback “Flying Floris” also on this Website. After the recuperation of spare parts, the foam was shredded.
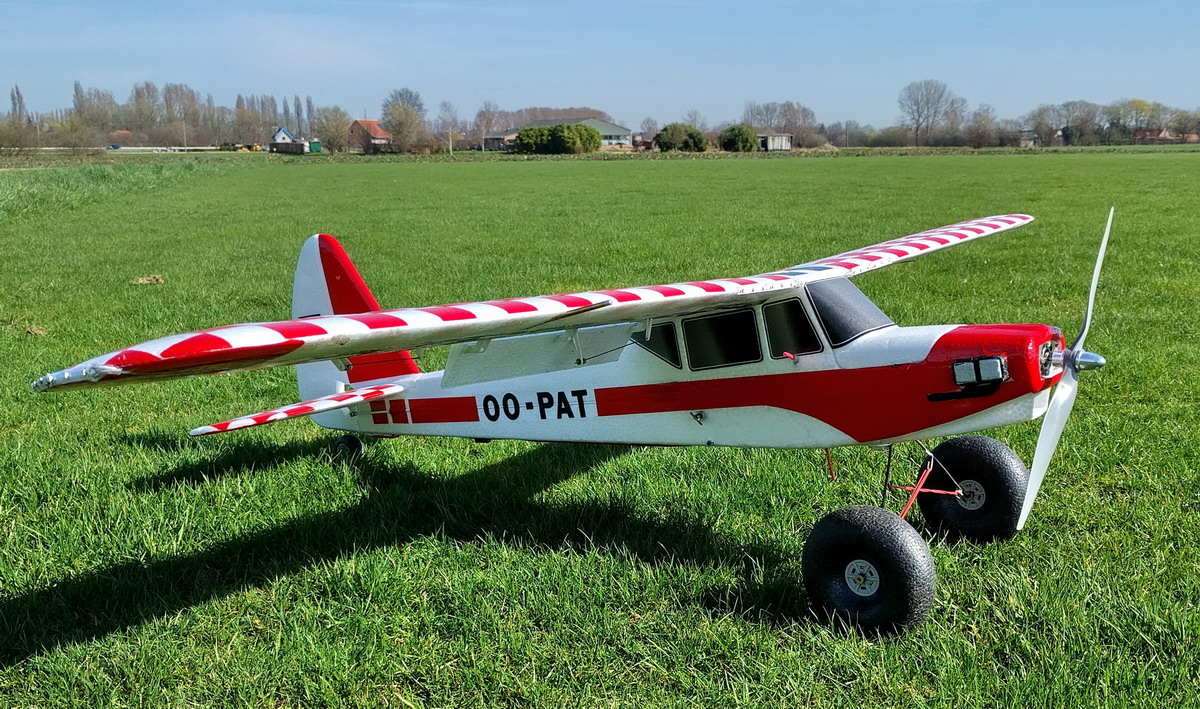
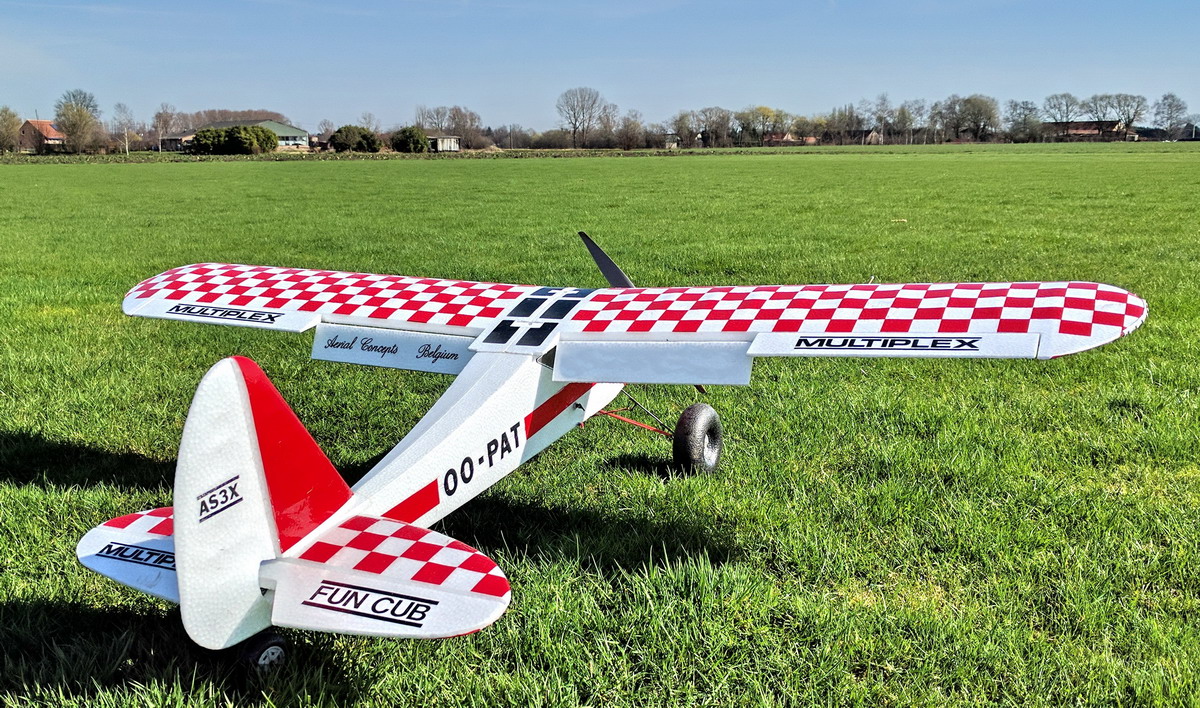
Started flying again with RC planes (after some 20 years) with the Multiplex Fun Cub. One of the first great things about this plane is it’s 55 inch size (1.4m). The wings come off and on in about 2 or 3 minutes. Simply plug in your servo leads, and screw in the two nylon screws and you’re ready to go. The plane is very versatile and perfect for just about any field. It takes off in a few feet. Landings are easy with or without using the flaps.
Mods
Changed the look of this plane with Oracover ironing film on top of the foam. Cut more than a hundred separate squares of Oracover film. Add extra suspension on the Landing gear. Relocated a Flap Servo to save an RC channel. Lights to fly in the evenings or with some fog. Installed Spektrum airspeed, voltage, and flight power telemetry. Installed Spektrum 9ch with AS3X technology RX.
Test aircraft
This aircraft is in service since 2016 and flew the most flying hours of all my airplanes. I use this plane now to test new setups, flying modes, and electronics. In 2020 I have tested the new spectrum receiver AR6610T together with the HobbyEagle A3 Pro and the A3super 3, and specific flying-modes to takeoff, cruise, and landing.