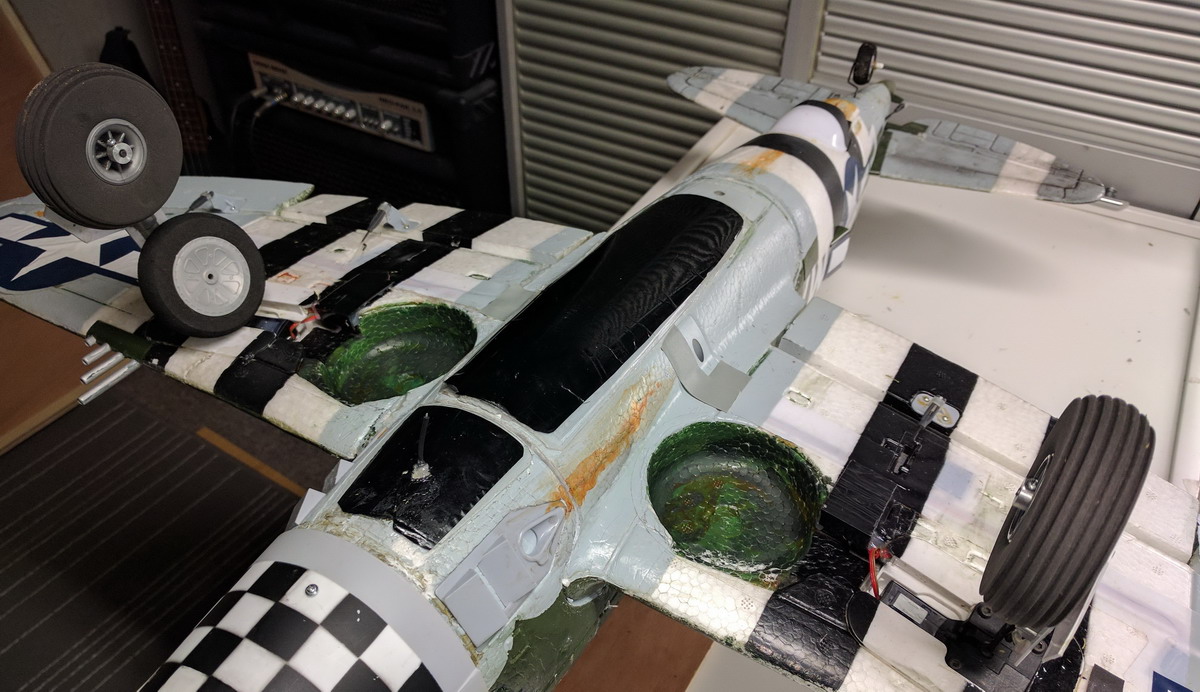

After more than three flying seasons, this plane crashed at the beginning of 2020, due to elevator servo disfunction. Because there was a lot of wind and the crash occurred in a field about 150 m from the runway in an allowed flying area a fire destroyed it almost completely. Because this was one of my favorites I will probably configure a new one out of spare parts for season 2021.
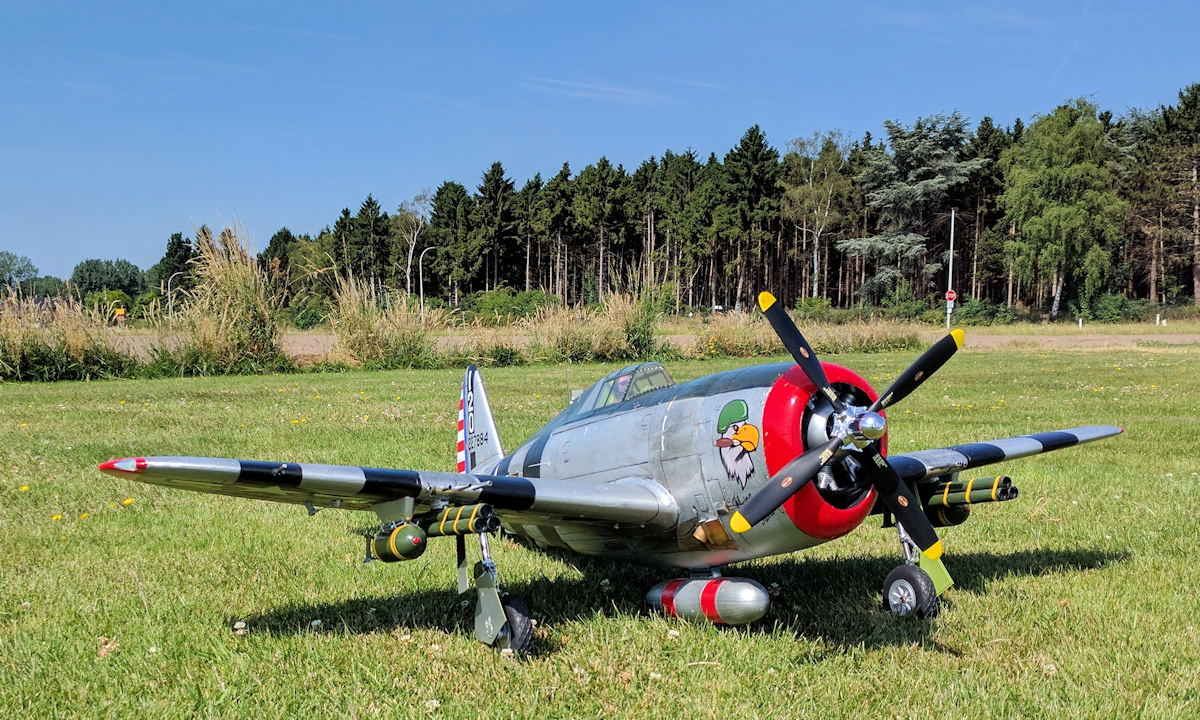
The Republic P-47 ‘Razorback’ Thunderbolt was an outstanding fighter, both in the bomber escort and ground-attack roles. It was the largest and heaviest single-engine fighter built during WW2. It was the last in a series of aircraft that began in 1936 with the Seversky P-35 and included the P-43 Lancer in 1940. Common to all these aircraft was their designer, Alexander Kartveli. In the Republic P-47 Thunderbolt, he produced an aircraft that brought the formula to fruition and made up for less successful earlier attempts. A total of 15,634 Thunderbolts were built in several versions. The ‘Razorback', as the first models were called by pilots and ground personnel, was employed intensively by the USAAF and RAF.
This is a highly scaled, lightweight RC-controlled model from FMS. The P-47 Razorback 1500mm adds a slew of innovations to a proven platform. Based on the original 1400mm P-47, the 1500mm model features a 99% scaled control surface, landing gear cover, cockpit interiors, plastic cowling, gun turrets, retracted landing gear, and panel lines. The plane's original oil paint has been replaced by water-based paint. It's built with a lighter and larger EPO 52 foam, making the plane lighter, giving it impressive flight performance without weakening the airplane's strength. New CNC-processed shock-absorbed front landing gear with the latest 2016 FMS electric retract. A new KV650 motor with Predator 70A ESC. All servos are now metal gear digital servos.
Modifications
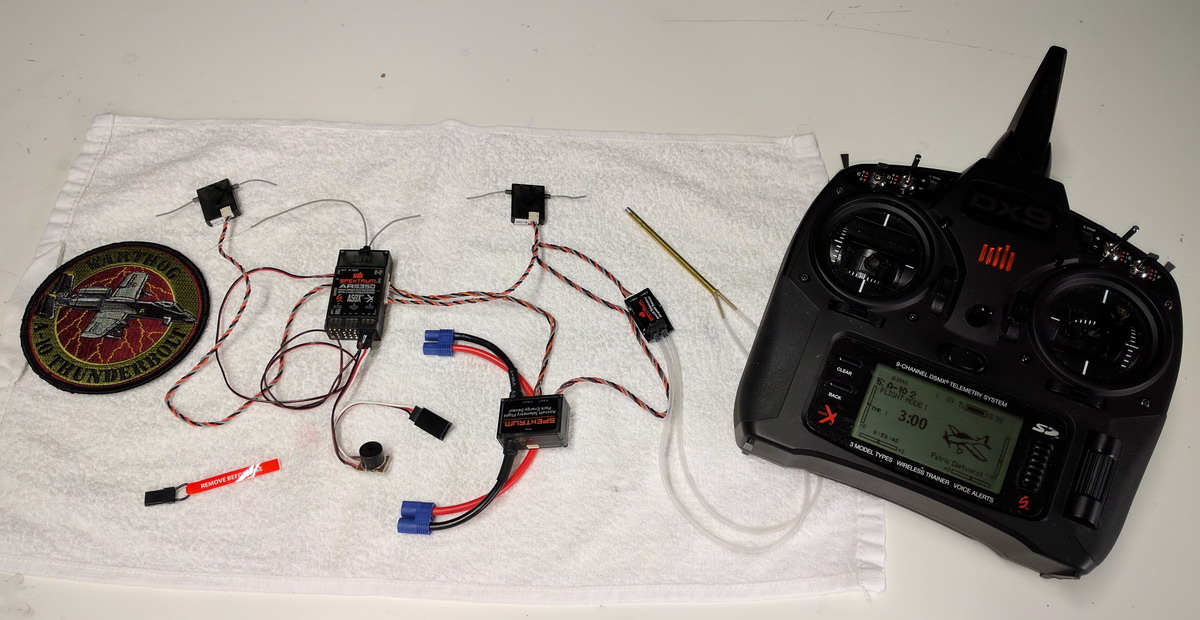
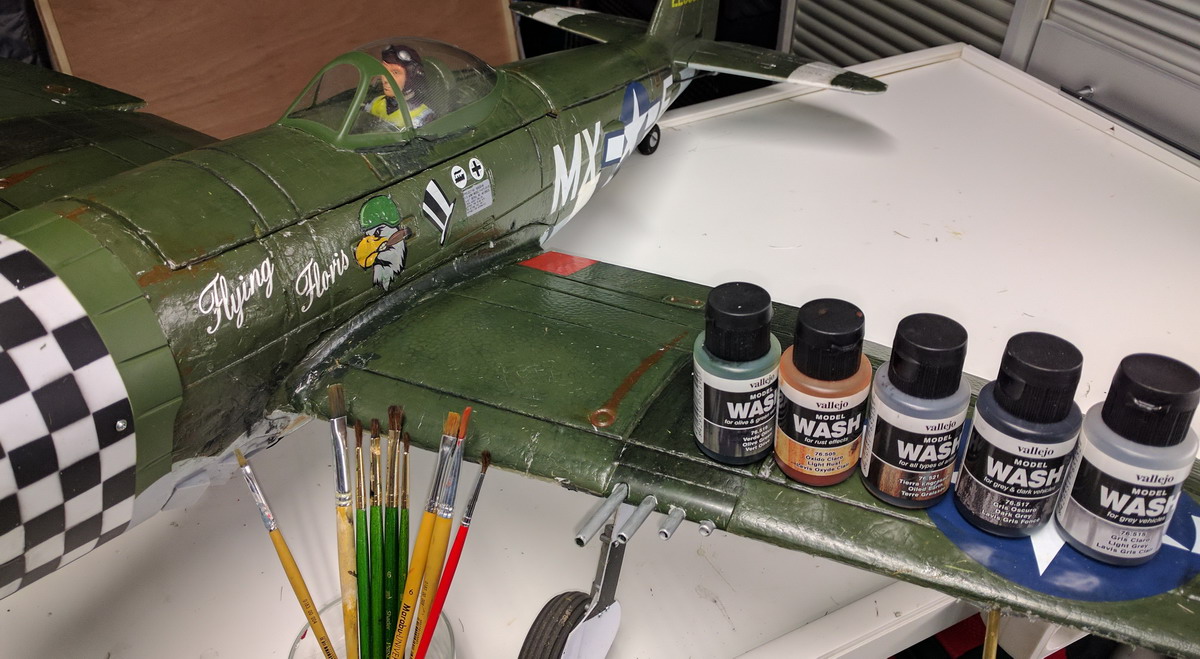
Used different types of weathering techniques to improve the look of this model. Oracover ironing film on top of the foam to change the look of this model. Added my own Decals inkjet printed on Testors White Decal Paper. Added Spektrum Airspeed, voltage, and Flight power telemetry. Put in Spektrum with AS3X technology 9 channel RX. Used a separate UBEC from Castle Creations and an Optipower Ultraguard battery with fail-safe switch PCB. Installed a sound module Aspire from MrRCsound with two Dayton Audio Exciters DAEX225CT-4 and the Pratt & Whitney R-2800 Double Wasp sound to maximize the allowable sound pressure to 84 dBA at 7m distance
Aircraft Characteristics after Modifications
Scale: 1/7
Wing Span: 1.5 m
Length: 1.3 m
Flight Weight: 4.2 kg
Wing Aera: 38 dm2
Wing Loading: 110 gr/dm2
Wing Cube Loading: WCL 17.9
Power: 6S 5200 mAh
Motor: 1x 4258 KV650 Outrunner
Propeller: 1x 14x8 4-blade
Stall Speed: 44 km/u
Sound Pressure: < 85 dB(A)/7m
Videos
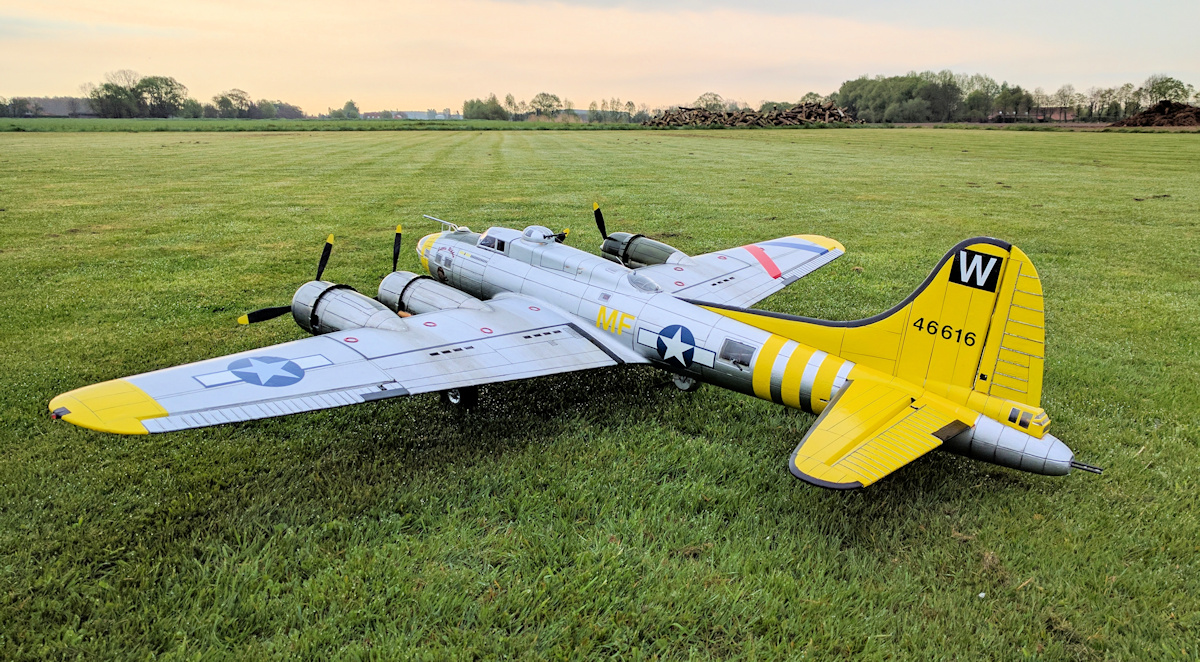
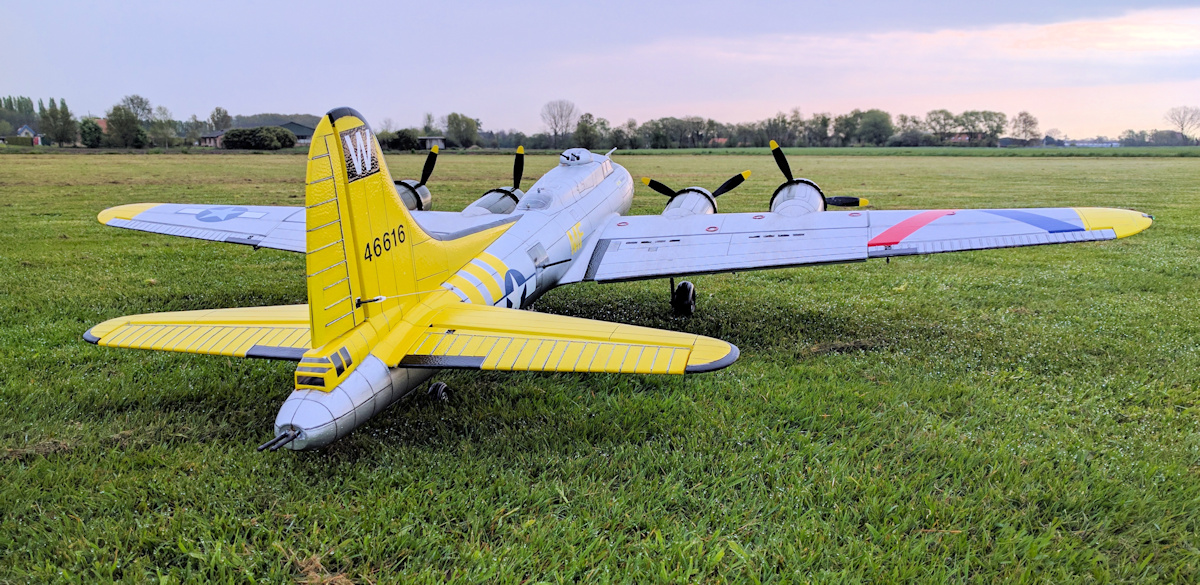
Photos